How to connect to Amazon EC2 Instance using Filezilla?
Answer
In this post, I will tell you what is FileZilla and Amazon EC2 instance and how to connect to Amazon EC2 Instance using FileZilla.
What is FileZilla?
FileZilla is a open source FTP, FTPS and SFTP software that allows you to transfer your file from your local machine to the Server.
What is Amazon EC2 Instance?
Amazon EC2 instance is the varying combinations of CPU, memory, storage, and networking capacity that allow you to run your websites.
The best part of the Amazon EC2 instance is that it will allow you to scale your resources to the requirements of your target workload.
Required Tools
To connect to Amazon EC2 Instance using FileZilla, you need 2 tools
-
PuTTYgen - To convert your .pem file to .ppk file. Because FileZilla accepts .ppk file only.
-
FileZilla - To upload all your files from your PC to EC2 instance.
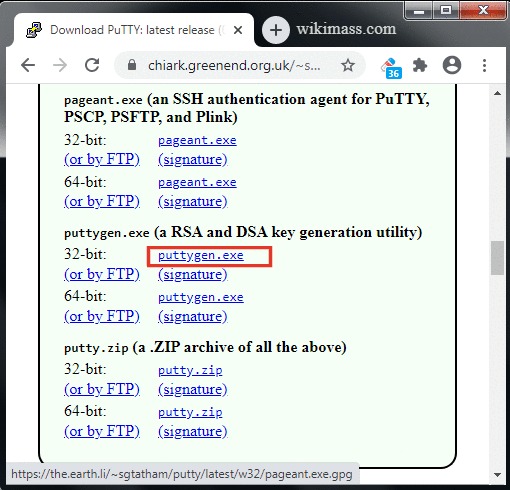
Download PuTTYgen
Download PuTTYgen (Mine is windows 32-bit).
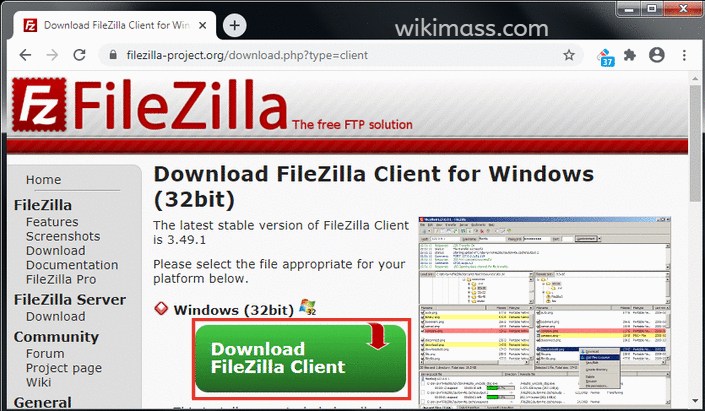
Download FileZilla
Download FileZilla (Mine is windows 32-bit).
All required software to connect to Amazon EC2 instance using FileZilla is downloaded and installed.
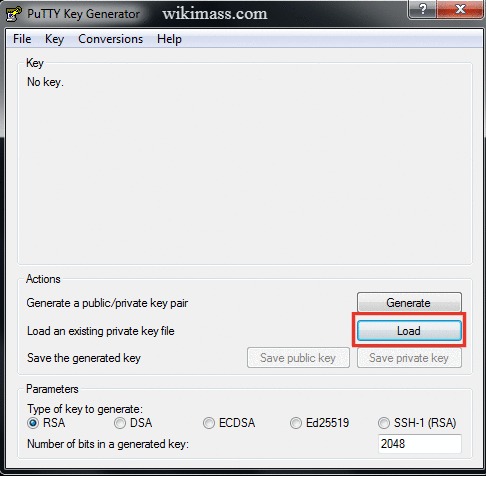
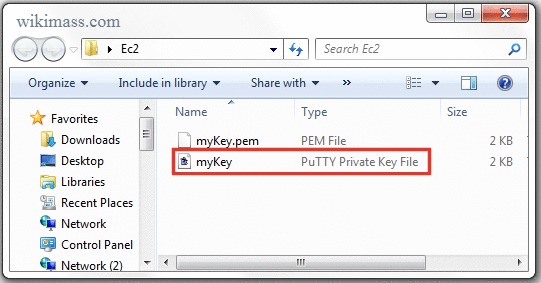
Convert .pem file to .ppk file
To Convert your .pem (that you created when you launched the instance) to .ppk. Do the following:
-
Open PuTTYgen and click on the 'load' button.
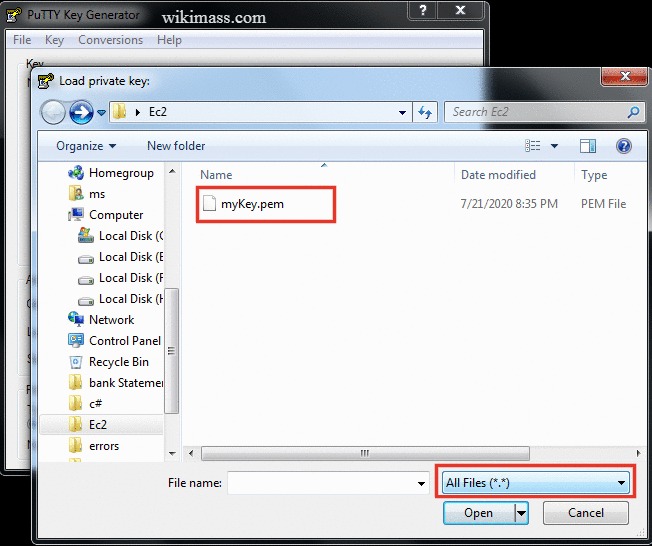
-
Change the file type to 'All Files(".")' and locate your .pem file.
-
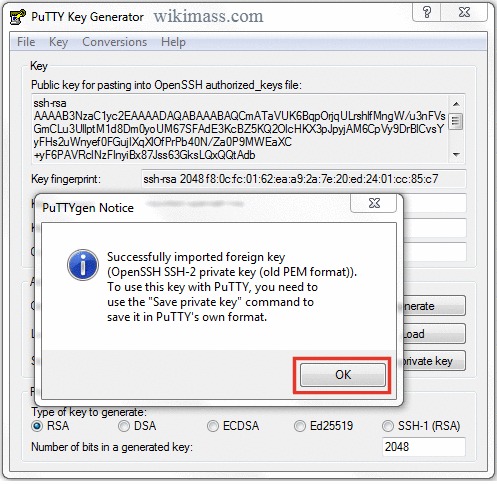
Click on your .pem file. Now, the PuTTYgen Notice dialog box appears, click on the 'OK' button.
-
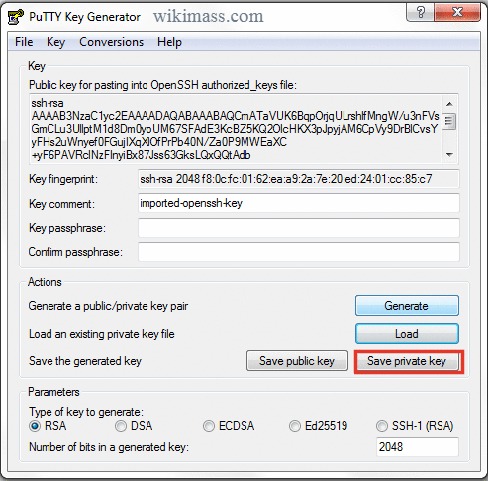
Now, click on the 'Save private key' button.
-
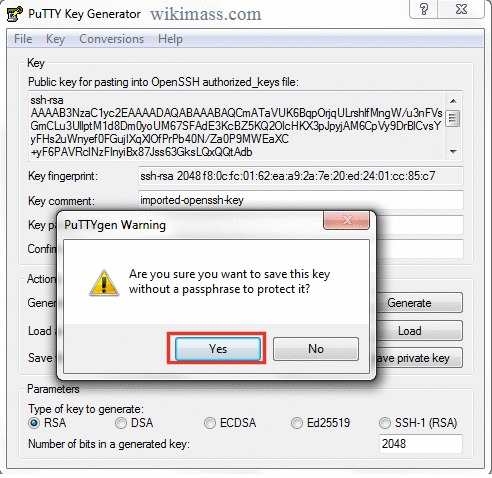
Now, the PuTTYgen Warning window appears, click on the 'Yes' button to save your key file without a passphrase to protect it.
-
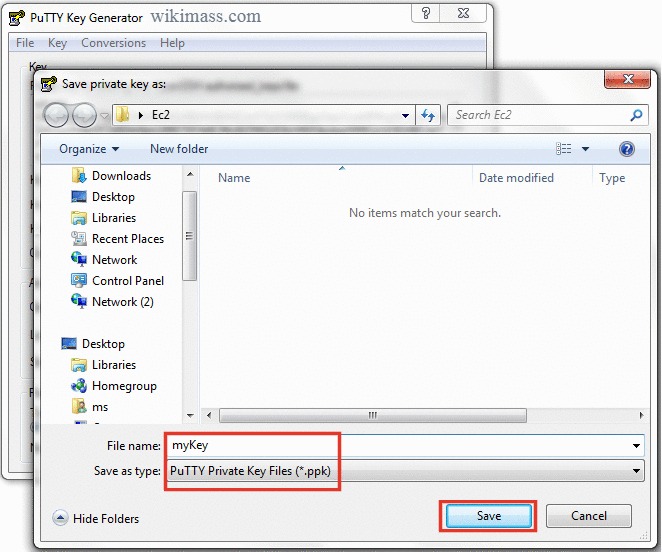
Type the ppk file name of your choice and click on the 'Save' button.
-
Hurry! you have converted your .pem file to .ppk file successfully.
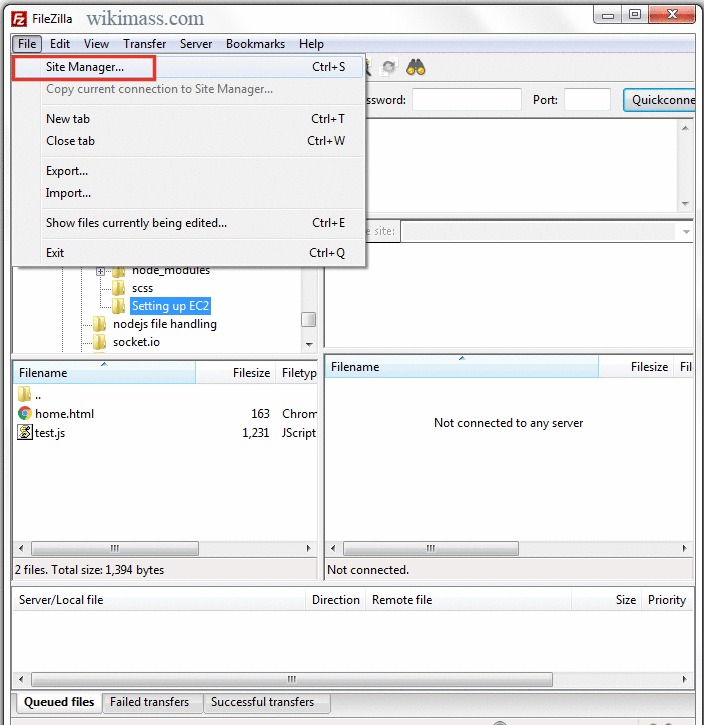
Setting up FileZilla
Now we will set up FileZilla to upload our local files to the Amazon EC2 instance. To do so, please follow these steps:
-
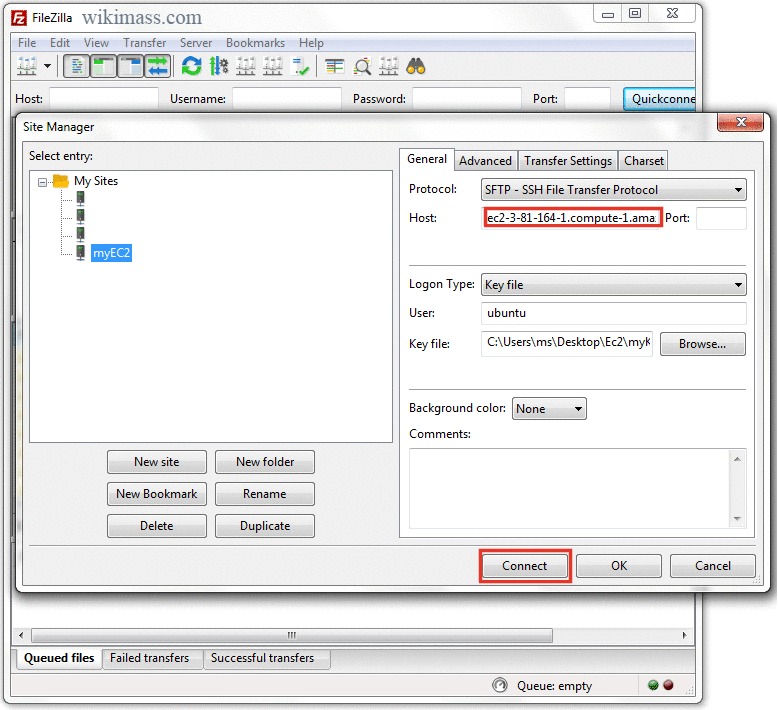
Open up filezilla and click on the menu File ⟶ Site Manager....
-
The 'Site Manager' Pop up window will appear. Click on the New site and type the name of your choice.
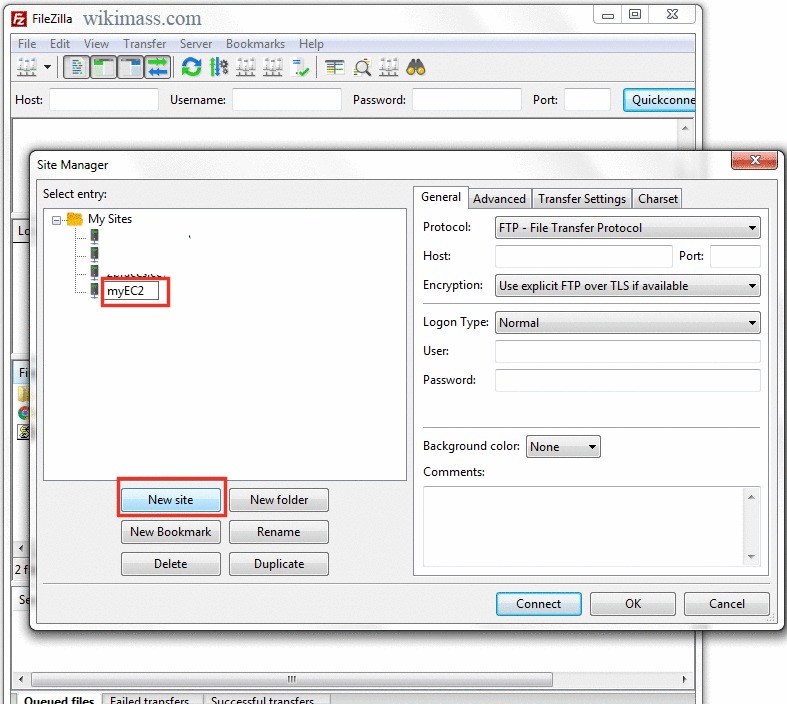
-
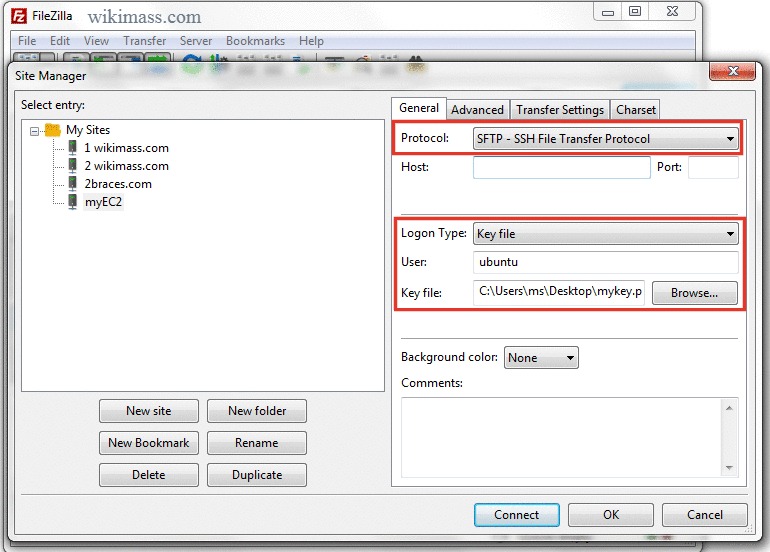
From the same window, do the following configuration:
- Protocol ⟶ 'SFTP - SSH File Transfer Protocol'.
- Logon Type ⟶ 'Key file'
- User ⟶ 'ubuntu'
- Key file ⟶ Locate your .ppk file by clicking on the 'Browser...' button.
- Host ⟶ Your EC2 instance 'Public DNS (IPv4)' name (follow next step).
-
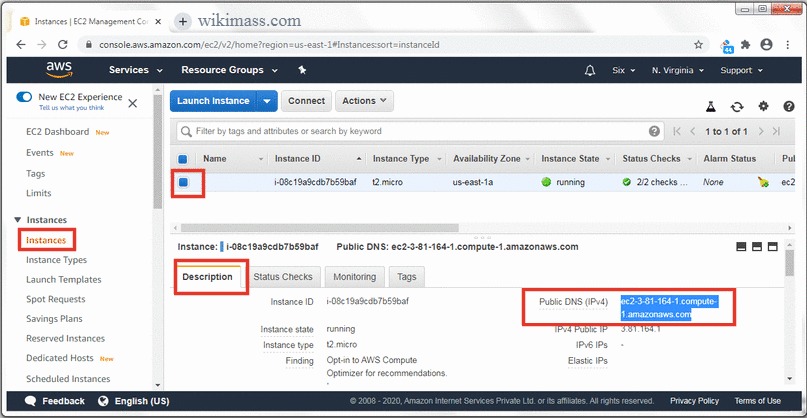
Open up your EC2 instance Page from 'AWS Management Console' and do the following:
- Click on the Instances on the left side menu.
- Click on the Instance that you want to connect from FileZilla.
- Click on the Description tab in the bottom menu.
- Copy your Public DNS (IPv4) name.
-
Now paste the copied value to the FileZilla Host input box and click on the 'connect' button.
-
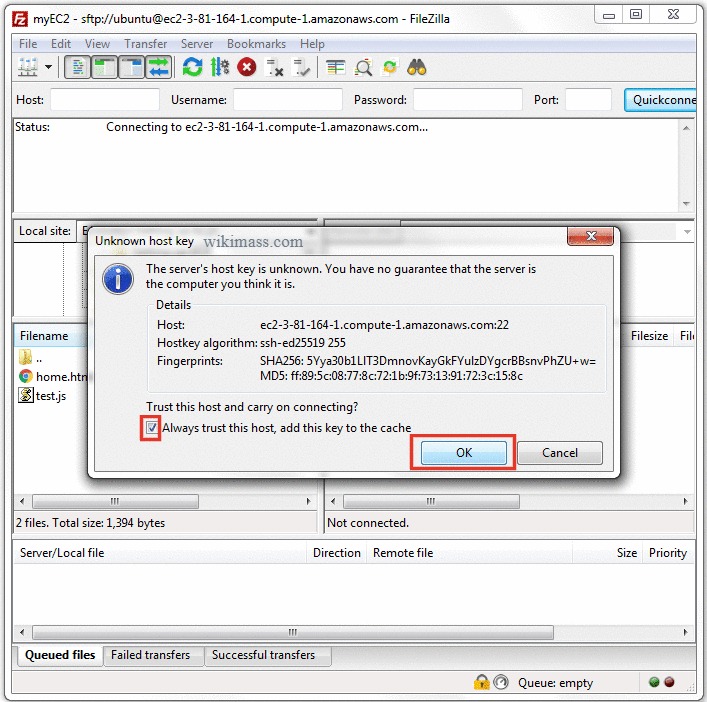
Now, the 'Unknown host key' window will appear. Tick the checkbox and click on the 'OK' button.
-
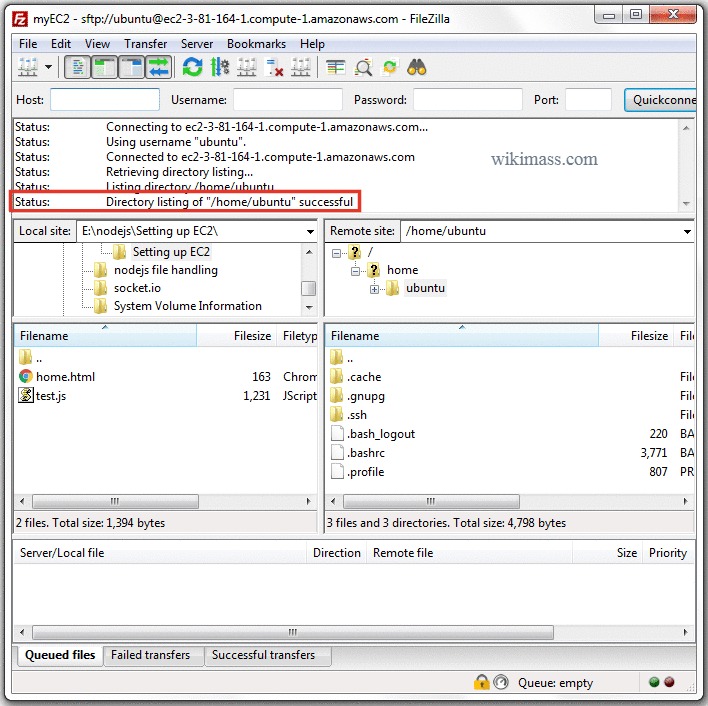
Hurray! You are connected to your EC2 instance via FileZilla.
Related Post
How to Deploy Node.js App in EC2 instance?
Join Our Channel
Join our telegram channel to get an instant update on depreciation and new features on HTML, CSS, JavaScript, jQuery, Node.js, PHP and Python.
This channel is primarily useful for Full Stack Web Developer.